by M.L. Altobelli
What do you do with an old, central Massachusetts farm – much of it poor-quality pasture with depleted soil – that has stayed within one extended family’s responsibility from the beginning? My sister and I, as the next-in-line owners of just such a farm, have accepted the challenge to revitalize the land so that it will produce healthy plants and animals.
By early August of 2011, Squash Tetsukaubuto in the 2010 HK bed has grown over the Yellow Finn potatoes, but we get a crop from both.
Woody End Farm in Westminster, MA, has been open land since the mid 1700s. It now has about 15 acres of “usable” land and used to be part of a much larger farm. The farm includes large areas that are either too dry or too wet for traditional cultivation methods. To achieve the goal of a revitalized and healthy farm, we’ve begun experimenting with Hugelkulture beds – with a nutrient-dense twist.
Hugelkulture (HK) beds are our version of the middle European concept of mound culture – piling up woody plant residue; covering it with compost, manure, or other organic material; and planting in the middle of it. It could also be looked at as a take off on the concept of nurse logs – burying logs near stressed trees in order to provide both a source of nutrients for beneficial fungi associated with trees and water for both the fungi and the tree roots as the logs decay.

The zucchini, raspberries and potatoes in the 2010 HK bed (shown in mid-August) grow through the straw mulch – mostly duck bedding at this point.
The Woody End HK beds are also built using concepts from nutrient dense farming, an approach that maximizes nutrients in the soil in order to create truly healthy plants and plant roots that lead to the most nutrient-dense food possible. Principles of organic, ecological, and bio-dynamic farming along with the precepts of remineralization all play a role in our efforts to create growing beds that improve the land and provide the healthiest crops possible.
Principles in Practice
The soil at Woody End Farm is predominantly grey podsol clay with a very low pH, around 5.2. Minerals barely register in testing, and overall the land as is does not provide enough nutrients to grow decent crops aside from low bush blueberries, sensitive fern and thimbleberry. The farm, however, offers other resources in the form of surplus organic materials.
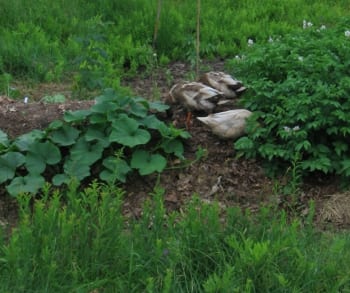
In July, Khaki Campbell ducks clean the potato plants of potato beetles and slugs. The plant on the left is the Squash Tetsukaubuto shown in the above photo.
The ice storm of December 2008 left us with piles and piles of wood in the wooded tracts of Woody End. Our animals, one horse (fun!), 14 goats (milk), and four ducks (slug control and eggs), provide a source of manure that’s mixed with wood fiber (shavings or sawdust) and hay. Healthy animals provided with all the minerals required for their optimum health produce a premium manure product. To acquire resources unavailable on the farm, we looked to local sources. We’re incredibly lucky to have a local source (two towns over) of blended or man-made peat/loam blend soil that’s consistent load by load. We also brought in a load of stone dust from New Hampshire – not so local and the shipping cost as much as the product! This did allow us to add a layer of “raw” stone dust to the developing beds and provide for a good microbial response. We added other specific minerals bought by the bag (50lbs) and mixed into a blend that was added to the beds as well.
Mound-building Steps
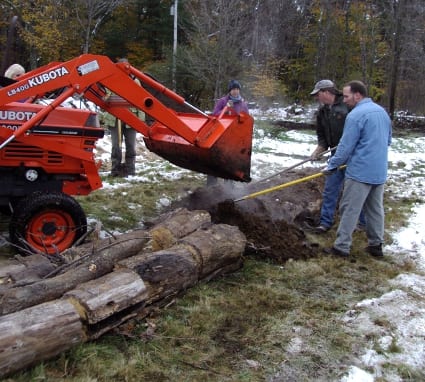
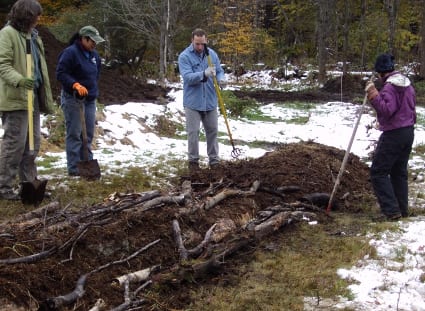
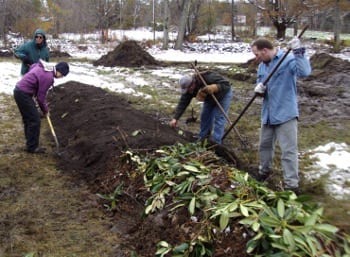
In late fall of 2011, we held an ELA Eco-workshop at Woody End Farm and about 13 people came to help us build some new HK beds. The goal for the day was to develop two beds – 30’ long – that stretched across a wet pasture with old failed drainage ditches. The beds were set into the decaying swales and built up from there. Several rainy days preceded the workshop, and the forecast called for snow later in the day, but we pressed ahead anyways (it was a gutsy group that showed up!). The area assigned to the new beds was between a greenhouse, slightly uphill, and two recently dug drainage trenches filled with several inches of water. With the sites identified, work began.
Layer 1: Large logs. Logs, some extremely large, were coated with dolomite limestone and already laid out when the Eco-tour attendees arrived to help build the beds. Logs ranged from 8” to 12” in diameter and were placed such that this initial layer defined the width of the approximately 36” wide beds.
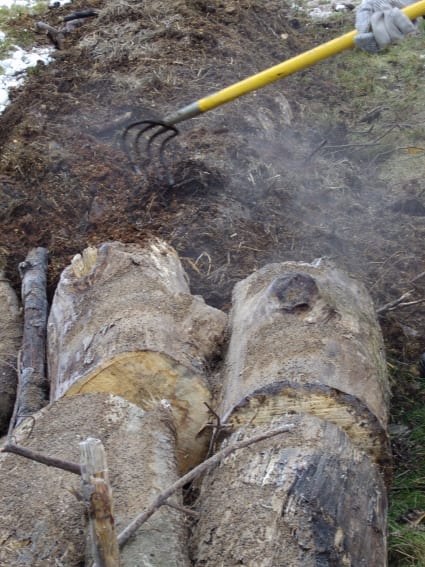
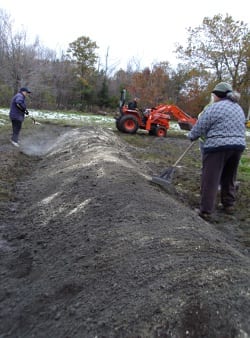
Layer 2: Composted manure. A tractor with a front-end loader scooped manure, composted but relatively fresh, onto the large logs. Everyone helped to rake in the compost, working it into the open areas between the logs. The manure compost will provide nitrogen for the wood’s decomposition and also provide a reserve of phosphorus and potassium. Calcite lime had already been added to the manure as it was cleaned out of the animal pens, so calcium did not have to be added. If we had been using manure that had not had lime added, then we would add a heavy cat’s paw dusting across the whole bed at this point. The manure layer covered the logs with some cores of compost over 12” deep and the tops of the logs covered with about 3”.
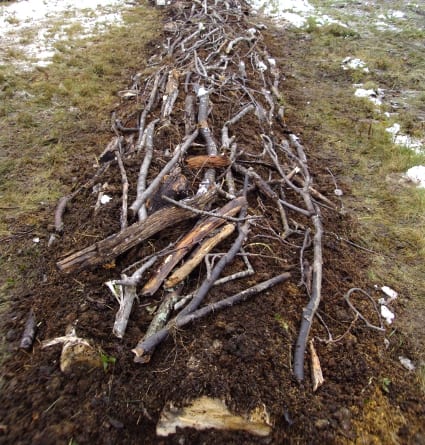
Layer 3: More wood. Smaller logs and large branches form the next layer. We selected wood from large piles stacked nearby, and we worked to weave the branches together into the depressions around the first layer of large logs. The lighter wood layer also added to the height of the overall mounds.
Layer 4: More manure. This batch of manure is mostly composted and has also had lime added or we would add lime again at this stage. We raked and pushed the manure through the branches of the preceding layer aiming for a depth of about 4”.
Layer 5: Small branches with leaves attached. Some of this was actually pruning debris from off site work done for the landscaping business. We wove the smaller branches into this layer, raising the height of the mound to approximately 18”. All of this height will settle over the winter and into the future as the beds both settle and start to break down.
Layer 6: Topsoil. We next raked a layer of the peat/loam blend from Sterling peat into at least a 4” layer over the entire mound, though we try to achieve a 6” layer wherever possible. Wayward branches that extended out of the topsoil layer were clipped and tucked back under the soil.
Layer 7: Stone dust. We spread a thin layer of stone dust, between 1/8” and ¼” over the mound. This layer helps prevent a crust from forming over the loam (any purchased loam is essentially “dead” due to handling and can often create a nasty crust that resists water) and also adds raw material.
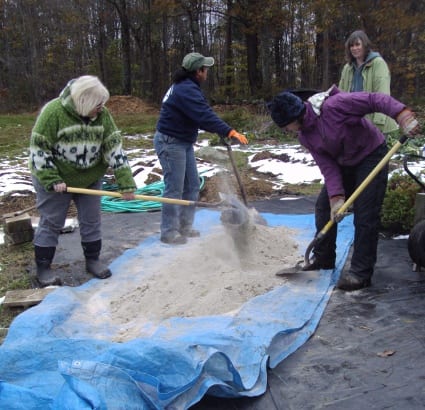
Layer 8: Minerals and microbes. Next to the last step! We mixed a special blend of alfalfa meal, rock phosphate, greensand, and azomite together on a tarp. Once it was blended so that no individual component could be seen, we shoveled a thin layer over the mounds – just a dusting. This is a mix that’s been developed over the years to greatly facilitate the growth of microbes, and we wanted microbes to get started through all of the layers of the mound – including the outermost edges of the bed. The recipe is here.
Layer 9: Adding mulch. This was almost fun after the harder work with the soil and its amendments. Mulch hay bales were opened up and broken into leaves. We layered the hay pads over the mounds and left the HK mounds to sleep for the winter. This last step was completed just as the snow began to fall for the Halloween storm, and the incoming storm meant we stopped taking pictures! By the next day, the new mounds were covered in 18” of snow.
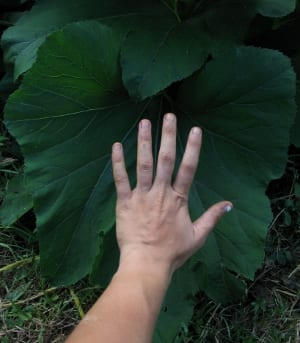
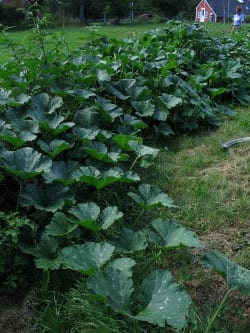
Taken the third week of August, this late summer photo shows the intensity of the green color, the total lack of mildew, and the large size of squash leaves.
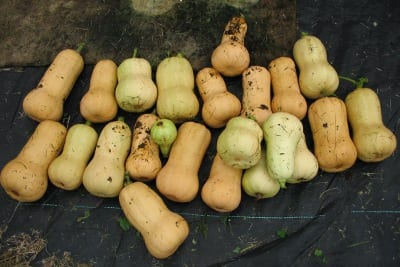
One butternut squash produced 22 fruit, although not all ripened completely. We fed the unripe squash to the goats, so the production wasn’t wasted.
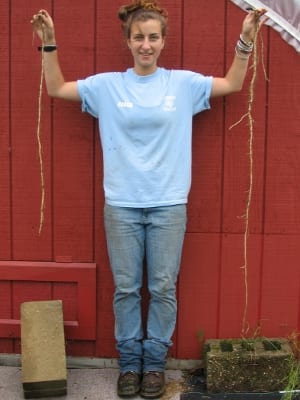
Amanda shows roots from butternut (left) and Japanese pumpkin (right) cleared from the HK beds. These are main roots, not the entire root hair and rhizospere connection. If you look closely, you can see where the root system would have branched and developed real depth.
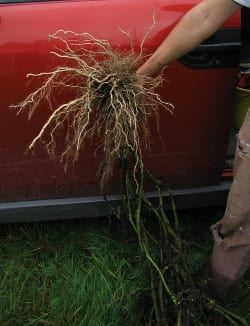
This massive root system belongs to a pot bound Jaunne Flamme tomato planted in the HK bed as an afterthought in early July. You can see the strength of the stems as they fall away from the roots. All of the garden “clean down” of the 2010 HK bed went into the base of the 2011 beds so as not to waste any of the biosynthesis and bio-availability generated from the first bed.
Positive Results
At the time we held the Eco-workshop, Woody End already had a couple of HK beds that had been built the year before. We wanted to try the concept out and figure out the problems before showing other people how to do it. From those initial beds, we harvested one butternut squash that produced 18 squashes and one Japanese pumpkin that produced over 22 three to four pound “pumpkin” squashes and both tasted fantastic. The mounds also produced other kinds of squash, tomatoes, potatoes, raspberries, and garlic. The Eco-workshop attendees got to take home some of the squashes and potatoes that had been grown on the 2010 mounds, as well as a good-sized bag of the top dress mineral blend for them to experiment with at home.
Future thoughts
This year will be a great chance to check out the drought carrying capabilities of the HK beds. Last year was a flood year and the beds only needed water four times. This year there will be beds that are one year and two years old. Which will do better managing water and production? How much water will need to be added? Less in the older beds because the wood has broken down more and has become an integrated sponge? As the realities of climate weirdness come to haunt us, there’s great appeal in working with a concept such as Hugelkulture with its potential to help mitigate some effects of a changing climate.
About the Author
M.L. Altobelli has been creating and maintaining fine gardens for over 20 years and brings a strong commitment to creating sustainable soils for healthy people, flower, trees and grass to all of her sites. With a B.S. in Animal Science, M.L. has read widely about plants and soil, and she experiments to find ecological and organic solutions that suit the individual site. A founding member of ELA, M.L. currently serves on the Board of Directors. Her work at Woody End Farm was recently written up in the Sentinel and Enterprise. M.L. may be reached at altobelliml260@comcast.net.

