by Steve Cushman
One of the most important chores for tool maintenance is keeping cutting edges sharp; however, sharpening can cover a huge realm of techniques and tools. Here I’ll address techniques requiring only a small investment in tools. Use of mechanical means of sharpening such as grinding are not addressed.
Tools for Sharpening
For most landscaping tools (e.g., shovels, lawn mower blades, axes, etc.) a file is a good sharpening tool. There are all sorts of files in a variety of sizes. The best overall file for our purposes is called a Mill Bastard, and the best size is 12 inch. Be sure to obtain a handle for your file when you make your purchase. Using a file without a handle is a really good way to wind up with the file tang painfully embedded in your hand.
There are many manufacturers of files. If you can find a NOS (new old stock) USA made file like Nicholson or Simonds, it will last a really long time. I recently declared a Nicholson I’d purchased in the 1970s (and used a lot) to be worn out. Time will tell if its replacement is as long lasting.
Files need to be clean to cut properly. The traditional tool for doing this is a file card, which has a steel-tooth brush on one side and a bristle brush on the other. First one brushes along the teeth with the wire side and then with the bristle side. Often, shop made tools are used to clean files. These consist of a short length (under a foot) of small diameter (3/8 inch) red metal (copper or brass) tubing with one end squashed. Raking this along the teeth does a superior job of cleaning the file. Chalk in the file teeth also helps keep them clean.
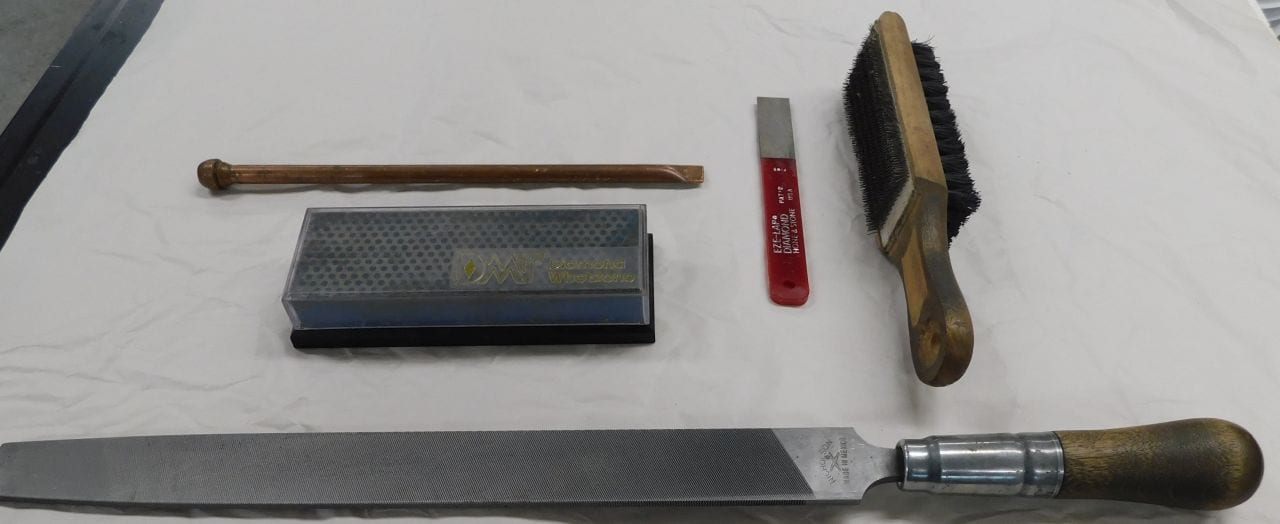
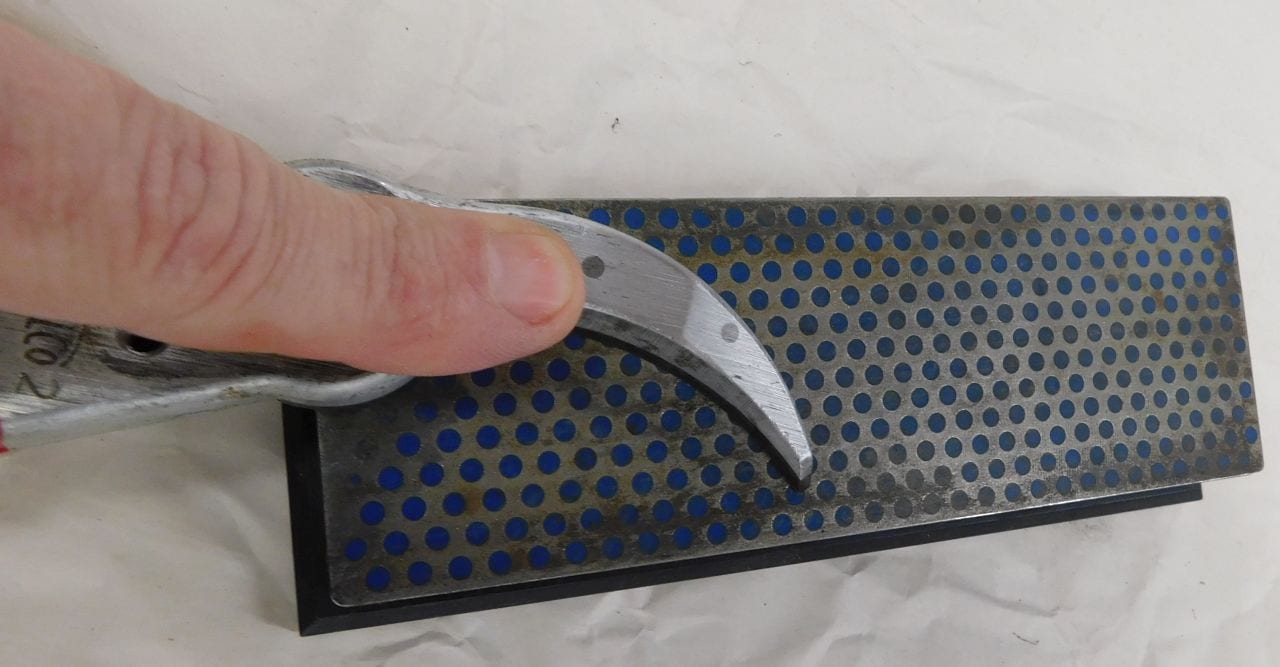
Tools to use for blade sharpening: 12-inch mill bastard file (bottom), a file card (right), a shop-made file cleaning tool (top), diamond stone (center), and diamond file (center right).

The shop-made cleaning tools is used to clean the file.
Whatever file you elect to use, be sure it is a single cut file – that means the teeth cut in one direction only. Double cut files are best for wood, not sharpening tools.
It is important (both from a quality and safety perspective) that the tool you are sharpening be held steady. A smallish (about 3 ½ inch jaw width) vise is appropriate for this activity. For demonstrations, I bolt a vise to a board and clamp that board to a handy table.
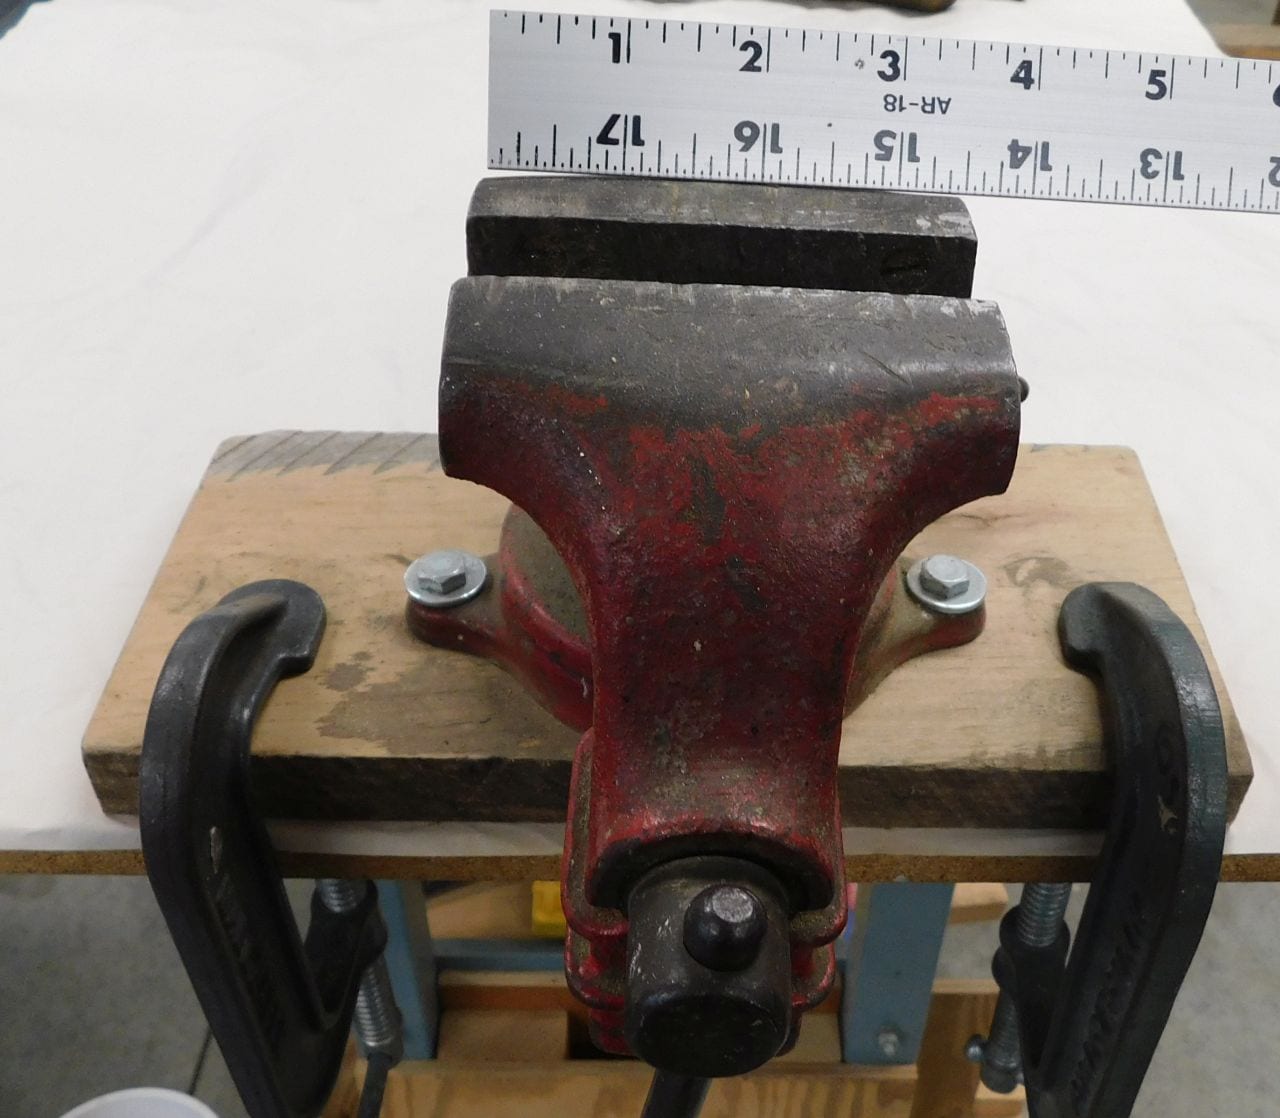
For demonstrations, I clamp my vise to a table.
Many small vises are available in stores. I am somewhat hesitant to recommend particular stores or brands as many are produced strictly for the mass market. Looking for older vises at yard sales and used tool stores may well be a better option.
Landscaping tools made from harder steel than shovels and lawn mower blades (pruners, for example) require some sort of an abrasive stone for sharpening. Oil stones have been used for these tasks for many years, but these are relatively high maintenance items. Diamond stones (which consist of industrial diamond powder bonded to a metal base) are available at reasonable prices, are well suited to these tasks, are low maintenance items, and are available in multiple sizes. I recommend acquiring two diamond stones: a bench stone and a hand stone (sometimes called a diamond file). Maintenance on diamond stones is easy, just wipe them clean with a rag or paper towel after each use. Some manufacturers used to recommend soaking them after every use, but that is no longer the case due to potential rusting of the metal base.
When stones are not available or special shapes are required, there is an alternative: wet-dry sandpaper (400 grit is usually a good choice) cemented to a really flat surface. The traditional flat surface is a piece of plate glass (not window glass). Another perfectly acceptable alternative is a piece of stone (granite, for example) tile which is factory ground to a very flat tolerance (do not use ceramic tile which is not flat at all). 3M™ 77 or 90 spray adhesive works well to adhere the paper to the flat surface – the 90 adhesive provides a stronger bond but is much more difficult to remove.
Sharpening Shovels
I find the most generally effective shovel is a spade – with a flat ended blade, NOT a pointed ended blade. Quality is important, and it is not that easy to find quality shovels. My favorite is a fully strapped nurseryman’s spade. Fully strapped means there are steel straps along both the front and back of the wooden handle, full length. As far as I know, A M Leonard is the only source of these tools today. I can attest that their quality is excellent, and the spades are guaranteed against everything except theft. They are not cheap, being around $100 each, but they do not break. Yet, that price compares very well with hardware store and big box store shovels which cost around $35 and are often broken their first day of use.
I’ve been asked why one would sharpen a shovel. The brief answer is that friction is your enemy. If the cutting edge of the shovel is reasonably sharp it will penetrate the ground more easily, cut roots with little effort, and generally make your life easier.
Sharpening a spade is easy. Hold it in the vise, handle down, back side towards you. Take your file with the handle in your right hand and your left hand holding the top of the file. Turn the file at an angle of about 40 degrees to the vertical and stroke across the shovel blade left to right. Put some pressure on the file so it digs in and try to sharpen the edge of the spade to about a 30-degree angle. It should take not more than about ten strokes with a clean, sharp file to accomplish this. You are not looking for an edge that will cut paper, but one which is reasonably sharp.
When you are done sharpening your spade, you can preserve its wooden handle by coating it with boiled linseed oil, which is available at paint stores, hardware stores, and big box stores. Avoid raw linseed oil as it does not dry in any reasonable time frame. Polymerized linseed oil works fine but is generally harder to find and more costly.
These same techniques work on pointed shovels. Treat the edge on each side of the point as a separate edge while sharpening.
The first time you sharpen a dull shovel it might take ten or more minutes to get it right. If you keep after your shovels, then just a few seconds every day or two will serve to keep them sharp.
Sharpening Lawn Mower Blades
My first advice is to have an extra blade for every mower (or an extra blade set if the machine has multiple blades). That way when the blade dulls you can switch out blades and go on to work without taking time at that moment to sharpen.
Take the blades off before sharpening them. Be safe when removing the blade – guarantee the machine cannot start by pulling the spark plug wire. Orient the machine in such a way that you do not dump gas or oil on the ground. Use the proper size wrenches. Do not rely on pliers, vise-grips™, adjustable wrenches, etc.; they will only round off the fasteners resulting in difficult or unsafe conditions. Always replace any damaged fasteners.
There may be an assortment of parts holding the blade on. Remember what order they go in. If you are concerned about forgetting, take pictures – a digital camera or a cell phone camera is handy here.
Always examine the blade before sharpening. If more than one third of the width of the blade is worn away, discard the blade. If the blade shows any cracking, discard the blade. Damaged blades that come apart while being used are shrapnel – you do not want to be around. Err on the side of caution and safety.
Look at the hardware that attaches the blade. If there are nyloc style nuts and you don’t have spares, you can get an extra use out of them by heating the plastic/nylon core so it melts a little. Having spares is a good idea – buying them by the box at a commercial hardware distributor makes the price reasonable. If the nuts are not nyloc, a drop of red Loctite™ helps insure they won’t come loose unexpectedly.
Once the blade is off, clean any corruption (caked grass, rust and other slime) off the blade. Scrape it with a putty knife if necessary. Do not use steel wool in cleaning, instead use ScotchBrite™ or a similar product. Steel wool encourages further rusting by leaving microscopic particles of mild steel embedded in the workpiece.
To sharpen, place the blade in the vise held with one of the cutting edges to the top left. File just like as described for a spade. File until the edge is sharp. Turn the blade around in the vise and sharpen the other edge. Remember that the outside of the edge does most of the work; concentrate your effort there.
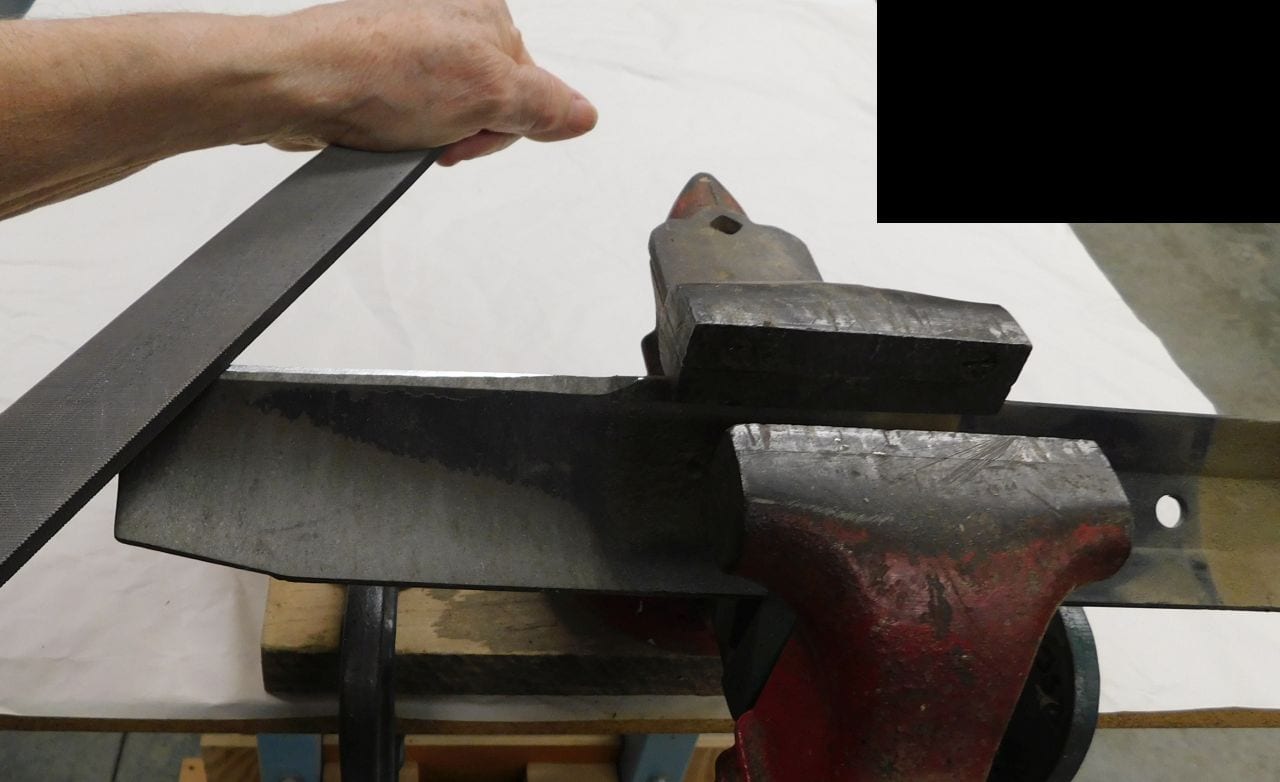
Hold a lawnmower blade in a vise to file.
Once the blade is sharp it needs to be balanced. There are all sorts of gadgets for balancing blades, but all you need is a round shank screwdriver. Stick the screwdriver through the center hole of the blade and spin the blade. If one end consistently stops down, it is heavy. File a little bit more off the heavy end and try again. You will soon get it balanced.
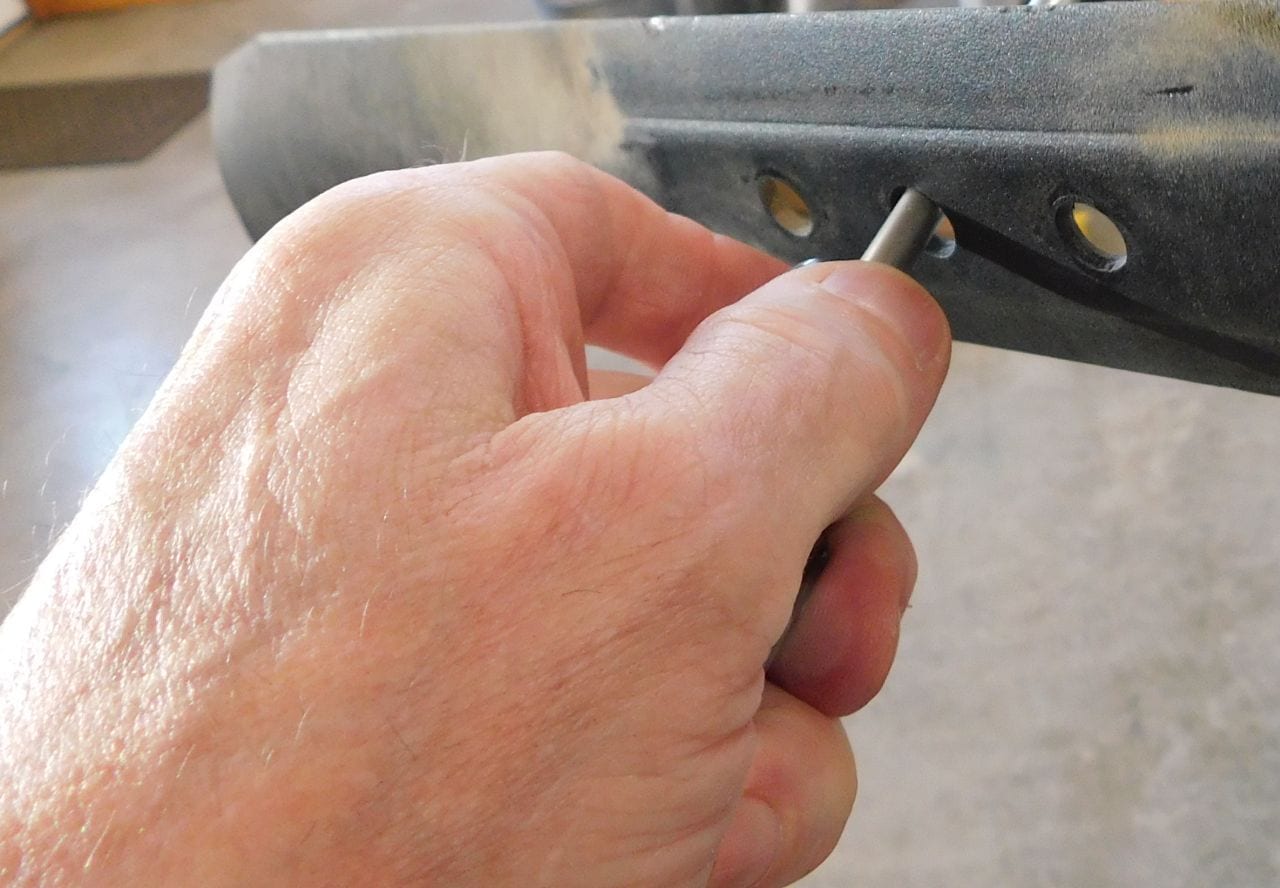
Balance the lawnmower blade by spinning it on a screwdriver.
Once you are in the habit of sharpening the lawnmower blades regularly it ought to take about 5 minutes to sharpen a blade.
The filing techniques described above can be applied to a wide variety of landscaping tools, including axes, trowels, cutter mattocks, and hoes, among others.
Pruners
While I will concentrate upon hand pruners in my discussion, the same information applies equally to loppers.
Pruners have blades made of harder steel than shovels and lawnmower blades. They are too hard to sharpen with a file. A “stone” is required as discussed earlier.
There are two generic types of pruners, bypass and anvil. Bypass pruners have a cutting knife that is sharpened on one side. That sharp edge slides past a bed knife and the cutting action would be a shearing action between them. Anvil pruners have a cutting knife that is usually sharpened on both sides and closes towards an anvil. The cutting action would be a crushing action between the cutting knife and the anvil but for the sharpness of the blade. The pruner must be adjusted such that the knife does not quite touch the anvil to avoid rapid dulling.
If at all possible, the pruner should be disassembled for sharpening. This will allow the best sharpening, but some pruners do not allow for disassembly. For example, I have an older Tiffany (not the jewelry company but the same name) lopper. This is a really well-designed small lopper, but the two halves are held together by a heavy rivet. Thus, it must be sharpened while still assembled. Also, the only method of adjusting the looseness/tightness of the action is to peen the rivet with a hammer. In these cases, one must peen carefully and gently as there is no way to “un-peen” if you get them too tight.
Sharpening Bypass Pruners
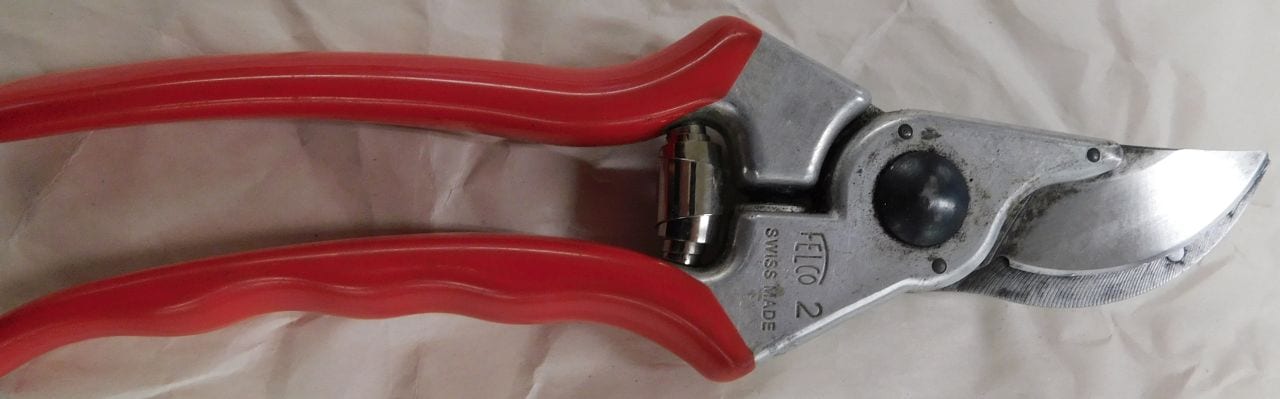
I will use Felco™ #2 bypass pruners as my example, but the concepts apply to most hand bypass pruners. Felco™ pruners are well designed pruners, they are easily maintained, and every part of the pruner is available as a replacement part. The #2 pruner (my personal favorite) is for a right-handed person with normal-sized hands. The #9 is a left-handed version of the #2. The #6 is designed for smaller hands and also has a reduced cutting capacity. I am not familiar with other available styles.
I’ll note that there are copies of Felco™ pruners on the market, some at a significantly lower price. I’ve seen one example, made in France, which seems to be of good quality. Others, not so much.
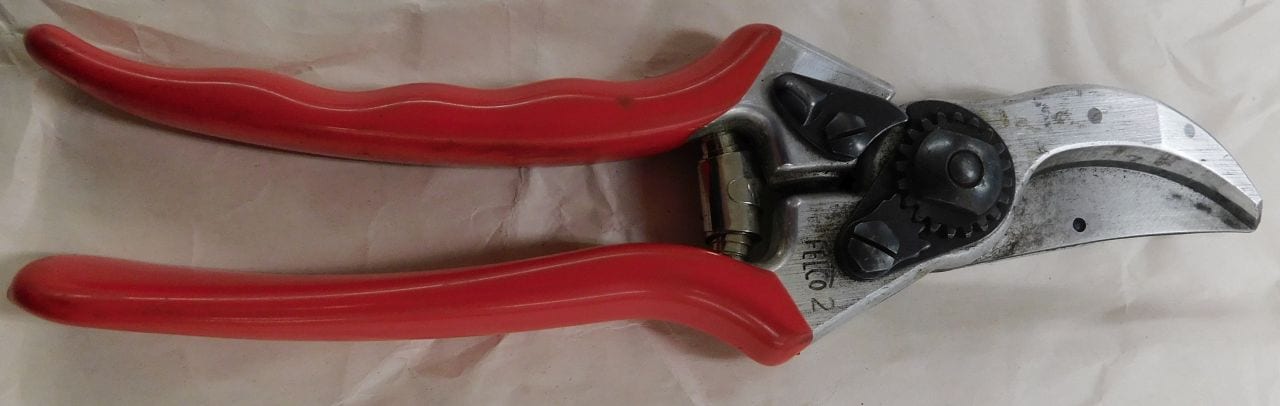
There is a little sheet metal tool packaged with the pruner which is a key/wrench for disassembly and reassembly. It is frequently lost and that is probably just as well as it could charitably be described as cumbersome to use. Three tools are required for disassembly: a 12mm open end wrench for the main pivot nut, an 8mm wrench for the locking key screw, and a 7mm wrench for the thumb latch screw.
There is also a screwdriver slot in the locking key screw, but it is more practical to use a wrench. Also, the thumb latch screw seldom has to be removed but often has worked its way loose and needs to be tightened.

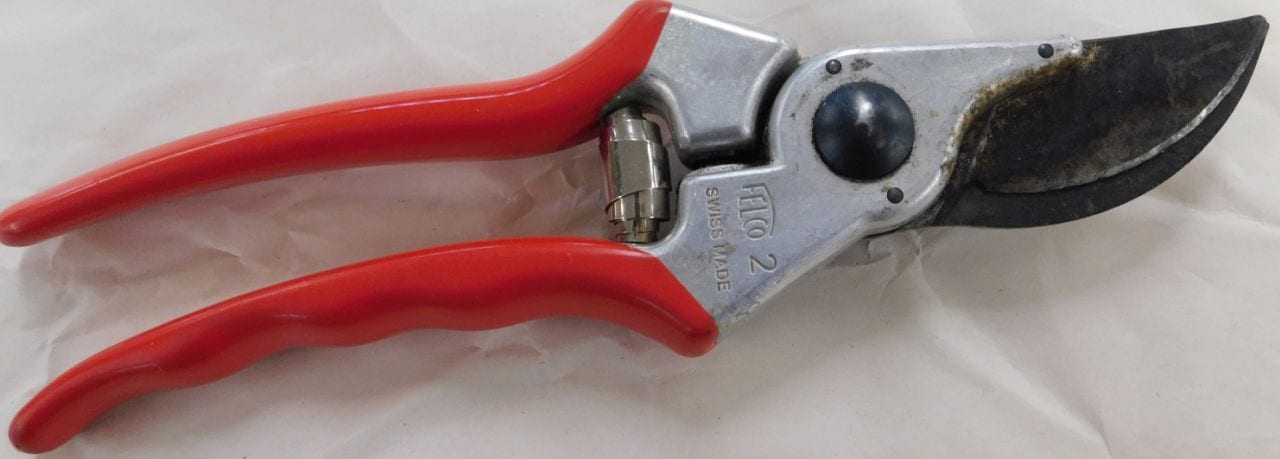
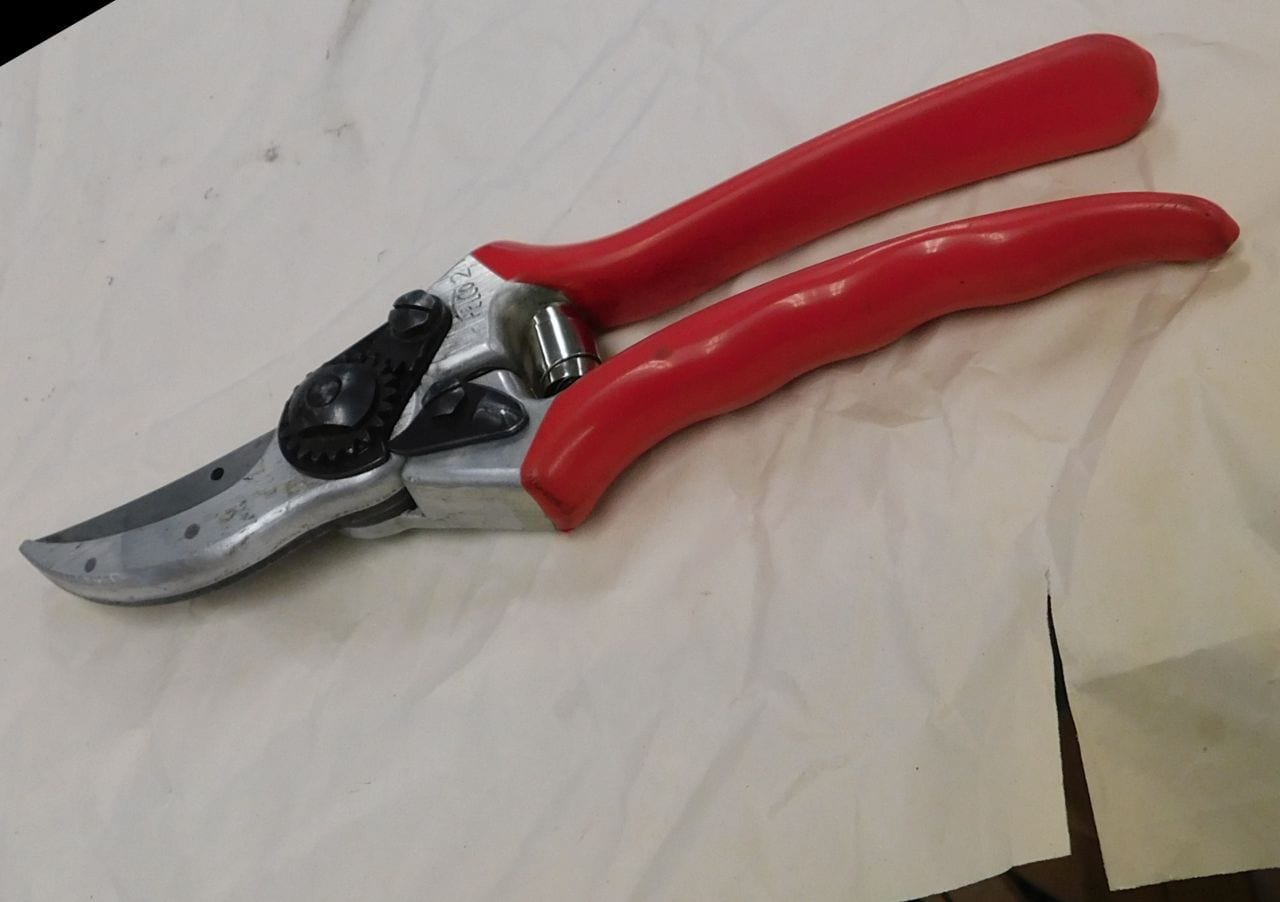
Bypass pruner before cleaning and sharpening.
Before disassembly, I clean the tool of grime and sap as much as possible. I’ll finish the cleaning after disassembly, but it’s easier to do the major areas first since there is more to hold on to prior to disassembly. I use ScotchBrite™ and sometimes a bit of WD40™, which is a good cleaner as supported by its Material Safety Data Sheet.
Cleaning larger surfaces is more easily accomplished before disassembly.
Take photos as you disassemble the pruners if you aren’t confident about how the parts fit together.
Next is disassembly. As always, if you are not confident of where the parts go, take photographs as you disassemble).
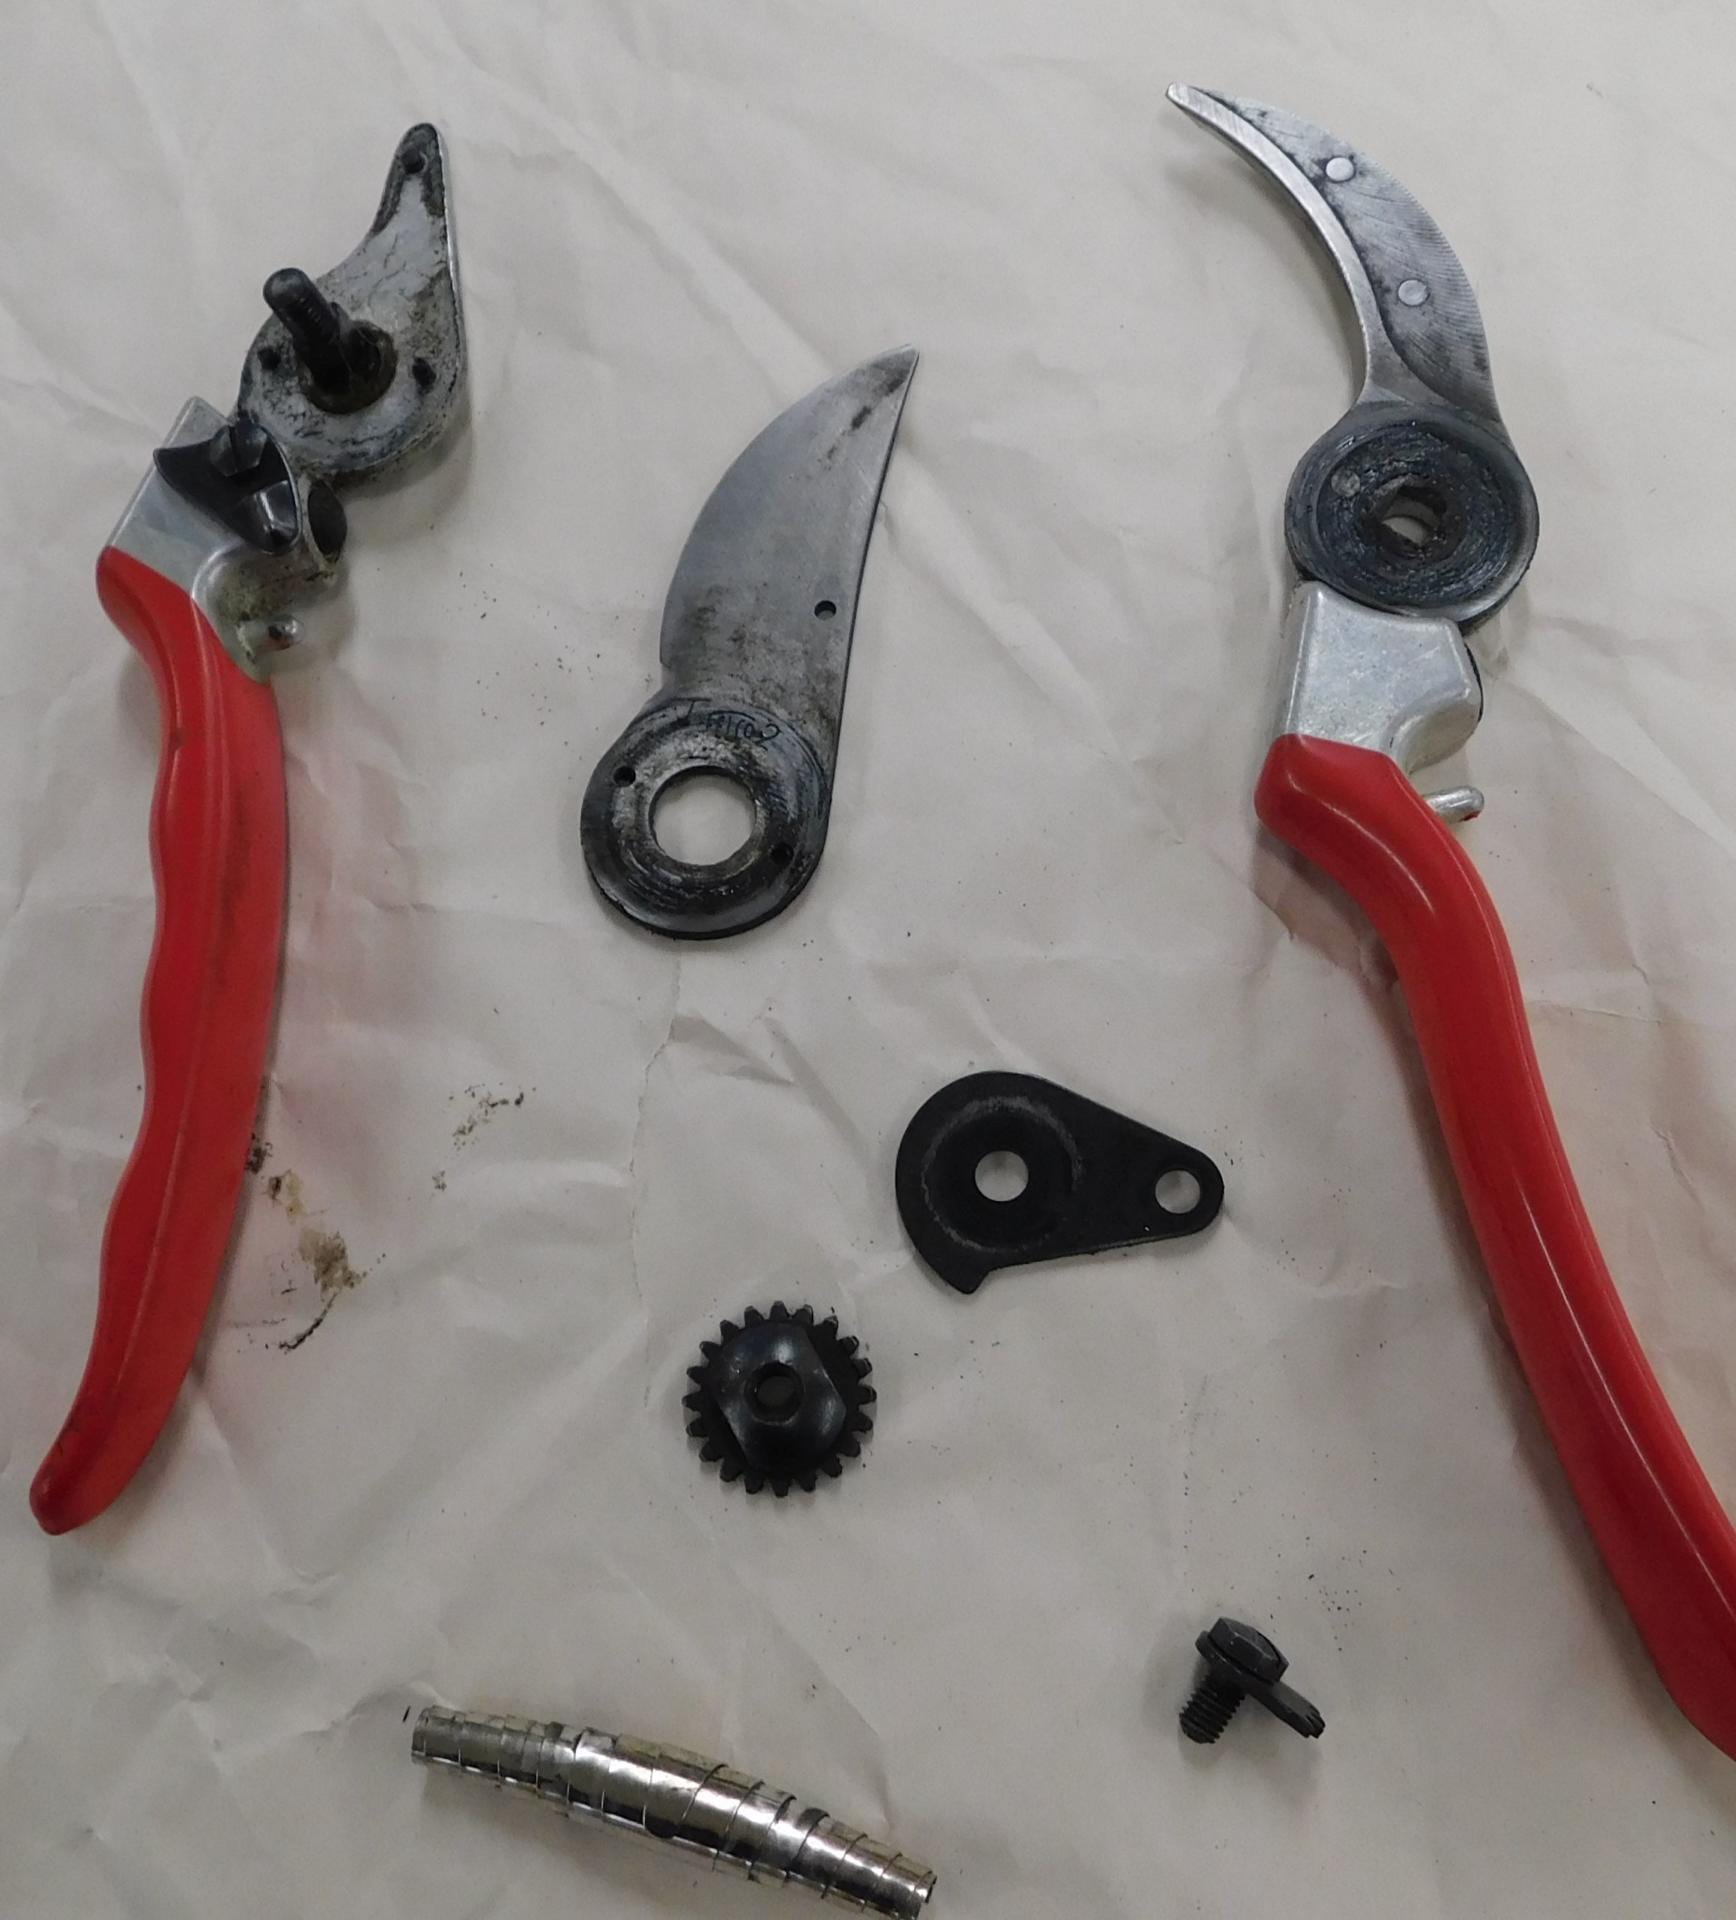
First, open the pruners wide and remove the spring by slightly compressing it and then pulling it off the studs. Second, use the 8mm wrench to remove the locking key screw and then remove the locking plate. Next use the 12mm wrench to remove the main pivot nut. Now you can separate the two handle halves, and the pivot bolt will likely fall out.
Disassembly is nearly complete, and this is a good time to resume cleaning. With a little work, you can get the parts looking like new!

After final cleaning, parts of the bypass pruners look like new.
The first part to be sharpened is the bed knife (which Felco calls the “counter blade”). This is the not really sharp piece that is attached to the lower handle. It is held in place by some pins and does not need to be removed from the handle for sharpening. For this part, sharpening might be called flattening. It is important to have a nicely defined (NOT rounded) edge where the sharp blade passes by the raised edge of the bed knife. This is accomplished by flattening the whole raised edge of the bed knife on your nice flat diamond stone (which can be done equally well on abrasive paper glued to a flat surface). Just place the edge firmly on the stone and move it around in a swirling motion. It does not take much effort as only a little metal is removed. When the raised edge of the bed knife wears down so that it is level with the rest of the bed knife, it is time to replace the bed knife.
The bed knife (counter blade) from our sample pruner, still attached to its handle, is flattened on the bench stone.
Next sharpen the blade. Remove it from the handle (the blade is held in place by three pins and is easily wriggled off). Be careful as the blade is sharp and will soon be much sharper – it may be advisable to wear gloves. Once off, clean any remaining pitch or other corruption off the blade. Now it is time to sharpen. The blade has an outside curve, and outside curves can be sharpened with a flat stone. There are two approaches. One is to hold the blade in your hand and work the cutting edge over a flat stone trying to follow the angle of the original factory sharpening. The other is to clamp the blade in your vise and then use a diamond file to follow the angle of the original factory sharpening. Either approach works, neither has any technical advantage, and you should use whichever you are more comfortable with. Keep working the edge until it is nice and sharp and you have worked out any obvious damage. Be careful to only work the beveled edge; the other edge must be flat. When you are done, lay the flat side of the blade down on your diamond stone with the sharp edge away from you and draw it towards you once. This will remove any burs generated by sharpening.
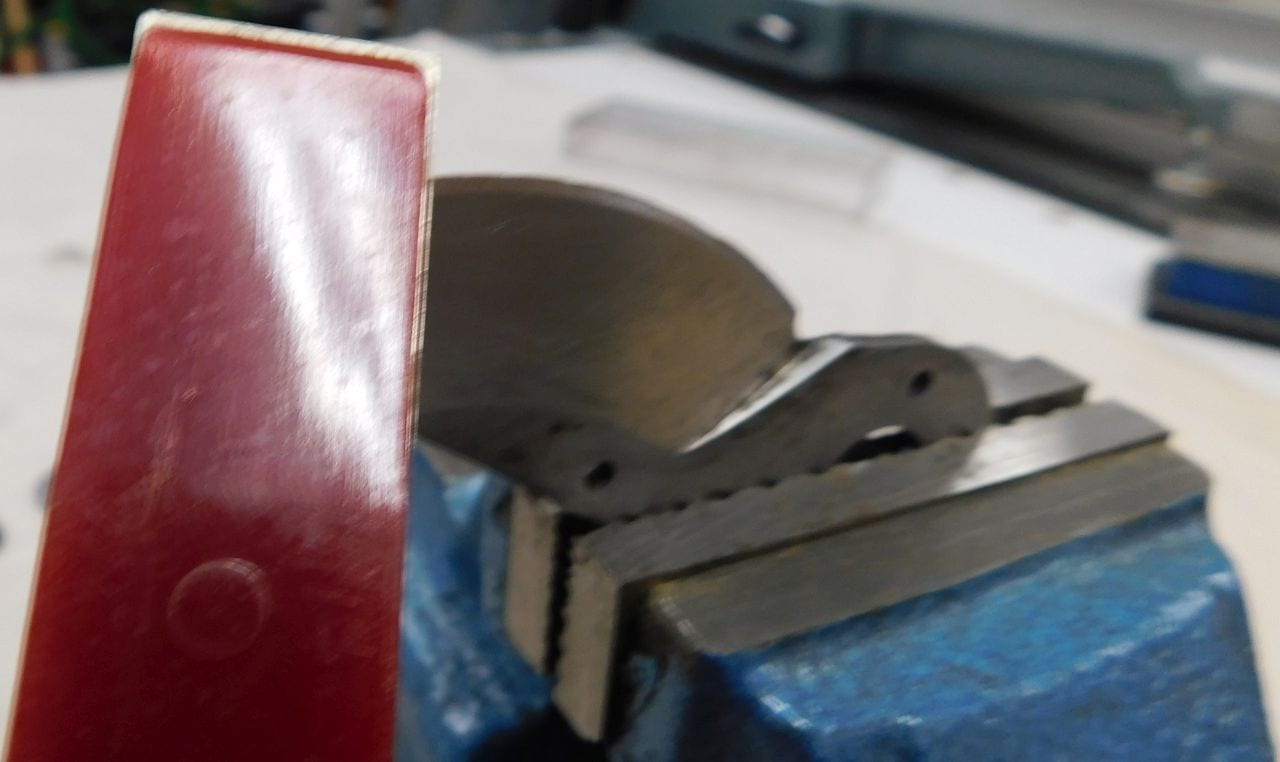
Hold the blade in a small bench vise and sharpen with a diamond file.
Now it is time to reassemble. Just put the parts back together in the reverse order of disassembly. A little lubricant between the blade and the bed knife around the pivot bolt is a good idea. A light white grease like Lubriplate Aero™ works fine. When you tighten the pivot nut, tighten it until you can just move the handles comfortably and then replace the locking plate, key, and screw to ensure the nut cannot move. It is really important that the pivot nut be snug. Any slop here allows the two halves of the pruner to flop around, causing material to fold up between the blades rather than be properly cut.
Cutting a sheet of paper is a good test of properly sharpened pruners. When you have followed the above steps, the pruner should easily cut paper. And after some practice, the sharpening process should take less than 15 minutes.
After reassembly, the cleaned and sharpened pruners should easily cut a sheet of paper.
Felco™ pruners have plastic covered handles. After long use you may find the plastic has worn out. You can purchase some Plasti-Dip™ tool dip and recoat the handles of your pruners as required.
Sharpening Anvil Pruners
Anvil pruners are a somewhat different animal. Again, begin by cleaning the pruner. Pay careful attention to the anvil, make sure it is smooth and clean. The anvil is usually relatively soft, so any burs or nicks can be removed with a small file. Avoid using your stone (or diamond file) on the anvil as the softness of the material will tend to clog the stone.
Take the pruner apart to access the blade for sharpening. Examine the blade – some anvil pruner blades are sharpened on one side like bypass pruners, others on both sides. Sharpen just like the blade for bypass pruners except that you may need to sharpen both sides.
Reassemble the pruner.
Now comes the fun part. The blades of anvil pruners need to come very close to the anvil but not touch it. This is necessary because if they touch the blade will dull rapidly, and if they are too far apart the work will not be cut through.
To make these adjustments you need to be able to measure “very close” and “not touch.” To do this get some unprinted newsprint paper (sold in pads for children’s drawing) and some cigarette paper (sold for rolling one’s own cigarettes). Unprinted newsprint is about 0.005 inches thick; cigarette paper is about 0.0015 inches thick.
The anvil is usually held in place by one or two screws. Loosen the screws and adjust the anvil such that the newsprint is pinched between the blade and the anvil while the cigarette paper freely slides between the blade and the anvil. Then tighten the screws and test again to be sure all is correct.
Loppers
Tiffany loppers are a bypass device, like Felco™ hand pruners, but have two differences. First, they cannot be practically disassembled. Second, the edge of the bed knife is an inside curve.
Loppers require different sharpening techniques.
Flattening the back side of the bed knife is not applicable because the pruner cannot be disassembled and thus the clearances between the sides of the pruner cannot be reasonably adjusted. Consequently, the bed knife needs to be sharpened like a normal cutting edge.
But it is an inside curve, which is reasonably sharpened with a flat stone. The ideal tool is a profile stone, but you are unlikely to have one on hand and they are not easy to find.
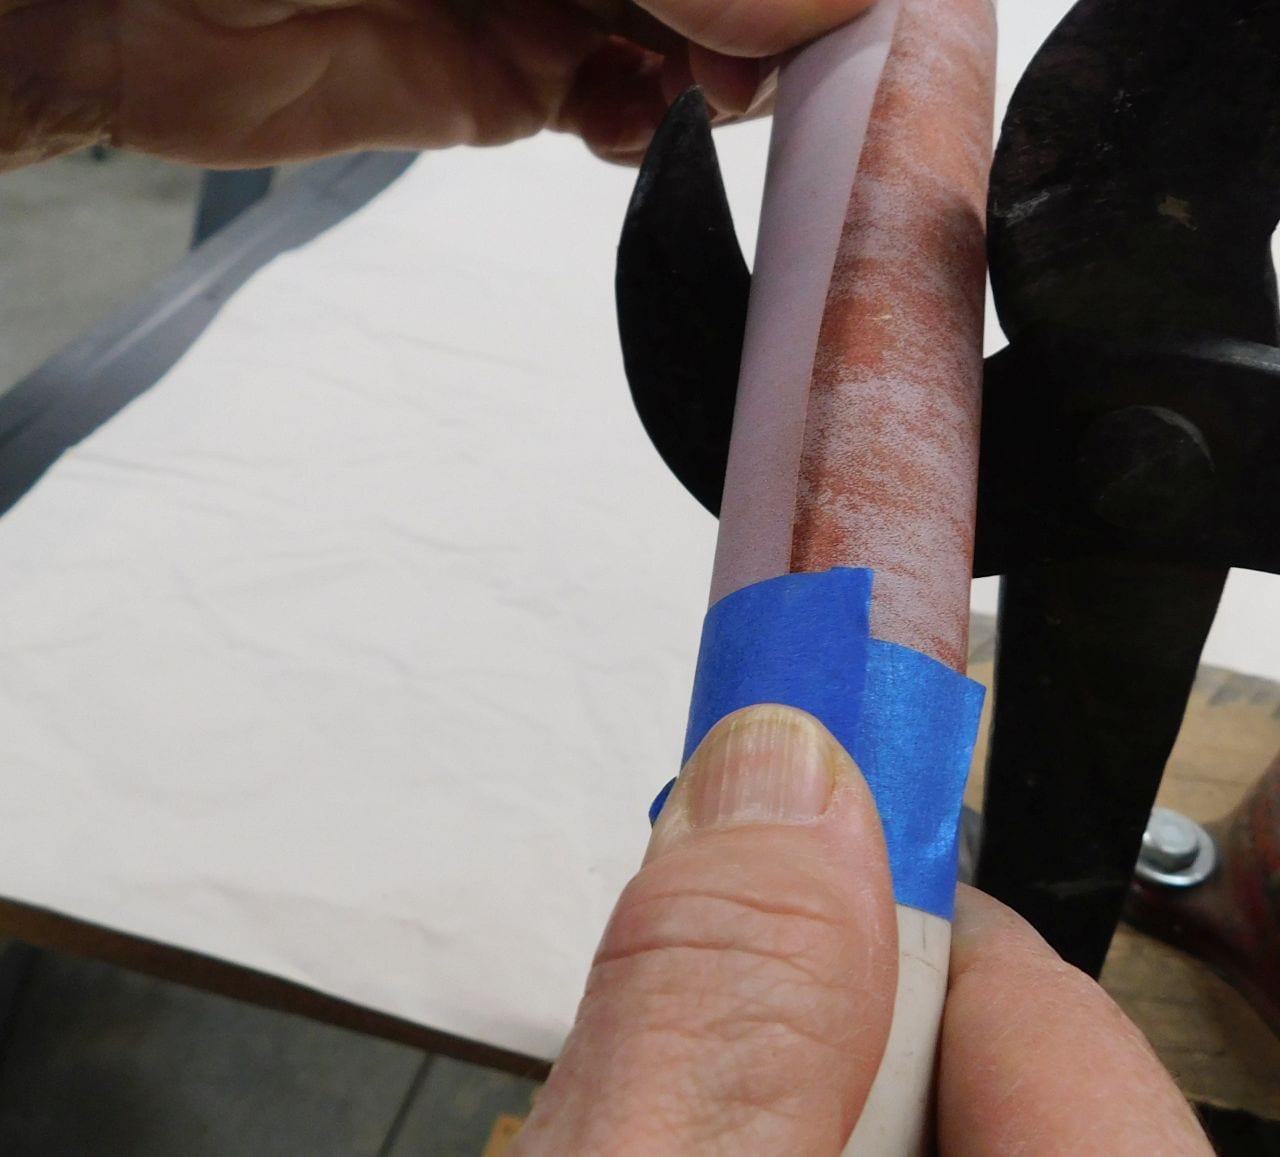
It’s easy to create your own tool for sharpening the loppers’ inside curve.
The solution is relatively simple. Find a dowel with a diameter less than the minimum radius of the curve in the blade (but not a lot less) and cut it to a length that fits comfortably in your hand (possibly a length of old broom handle). Wrap it with some 400-grit wet-dry paper to make a temporary profile “stone.” You may want to glue the paper to the dowel.
For this type of pruner, the bed knife with the inside curve is sharpened with a profile stone (purchased or improvised), and the main blade with its outside curve is sharpened with a flat stone.
In Summary
Hopefully the preceding material will have given you some idea of simple sharpening and tool maintenance principles. Remember that working with tools can be dangerous. Wear appropriate clothing. Make use of gloves, eye protection and sturdy footwear as appropriate. Be careful at all times and enjoy what you are doing!
There will always be things one is not equipped to sharpen inhouse and this will include commonly used tools not specific to the landscaping environment.
Access to a good sharpening shop can be most beneficial. There used to be many such shops spread around, but there are many fewer these days. I have few words of wisdom as to how to locate a good shop near you except that talking with craftspeople in your area may help. I find JD LaCourse & Sons on Middle St in Pawtucket RI to provide superb service. Anything I’ve ever brought there for sharpening came back sharper than when new. Like many sharpening shops they also sell much of what they sharpen. This includes circular saw blades, chainsaw chain, router bits, etc.
Diamond stones can be found at big box retailers, wood working supply stores (like Wood Craft), good contractor supply stores (like Burns Tool in Fall River MA), and good hardware stores.
Files can sometimes be found at big box retailers although finding a mill bastard in the 12” size is unlikely. These are easily found at industrial suppliers, although there are nowhere near as many of these stores as there once were. One is General Supply on Nauset St in New Bedford, MA. There are also online suppliers such as MSC (800-645-7270) and Travers (800-221-0270).
A M Leonard, previously mentioned as a supplier of quality landscape tools, can be contacted at 800-543-8955.
Since I am located in Southeastern Massachusetts, my focus on suppliers is based on that location. I am sure that there are good suppliers in your area also.
About the Author
Steve Cushman shares his experience maintaining and sharpening tools in a regular series of lectures at Tranquil Lakes Nursery in Rehoboth, MA.
***
Each author appearing herein retains original copyright. Right to reproduce or disseminate all material herein, including to Columbia University Library’s CAUSEWAY Project, is otherwise reserved by ELA. Please contact ELA for permission to reprint.
Mention of products is not intended to constitute endorsement. Opinions expressed in this newsletter article do not necessarily represent those of ELA’s directors, staff, or members.